|
|
-
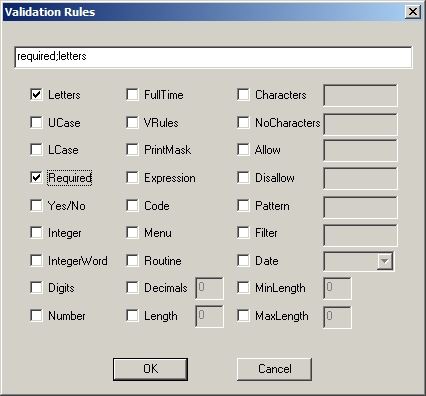
In the example above, the field has been set with validations that it is a REQUIRED field and can contain only LETTERS.
The validation options are:
LETTERS              UCASE              LCASE               REQUIRED
YES/NO               INTEGER            INTEGERWORD         DIGITS
NUMBER               FULLTIME           VRULES              PRINTMASK
EXPRESSION           CODE               MENU                ROUTINE
DECIMALS             LENGTH             CHARACTERS          NOCHARACTERS
ALLOW                DISALLOW           PATTERN             FILTER
DATE                 MINLENGTH          MAXLENGTH
When you have completed your list of validation rules, click on [OK].
Refer to Section 6.6.6, VALID(text_str, rule_str) for detailed information on the VALID function.
16.3.1.16 Field Definitions and Key Fields - General Information
-
Normally, when you define the record fields, each defined field represents a single piece of data in the record. This allows your programs access to all of the record data.
There are times when you want to process two or more adjoining fields. For example, if you have a last name field, first name field and initial field and you want to sort the records by name, you would sort the three separate fields--last name, first name and initial.
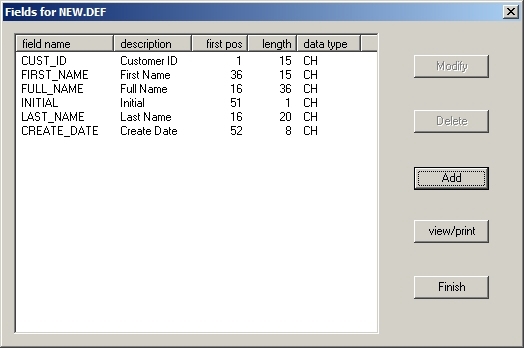
To simplify this process, you can define an additional data field, FULL_NAME, which can consist of the three fields. When you define the FULL_NAME field, the starting position would be the first position of the last name and the length would be the total number of characters in the three fields. Then, when you want to sort or print the full name, you need only refer to one field, the FULL_NAME field.
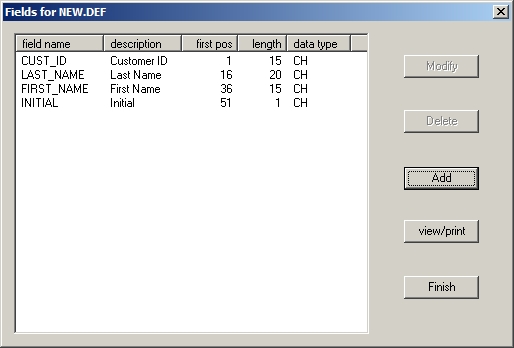
For example, if you have the following fields defined:
| Example 16-11 Defining Fields |
|---|
|
|
-
You would define the field FULL_NAME as in the example below:
| Example 16-12 Defining Fields |
|---|
|
|

-
Redefining fields becomes very useful when you need to set up unique key fields for ARS indexed files.
KEY FIELDS
If you are creating an ARS indexed file, you will be designating one or more data fields as KEY FIELDS. ARS indexed files require at least one key field.
When you use the CREATE procedure to create an ARS indexed file, you will be prompted for a primary key field and alternate key fields.
Sheerpower supports keys of 4096 bytes in length.
Key fields contain unique data which enables programs to locate records very quickly. For example, the customer number field could be a key field because all the customer numbers in all the records would be different. This type of key field is called a UNIQUE KEY FIELD.
DUPLICATE KEY FIELDS contain unique types of data but the data might be found in more than one record in the file. Any defined or redefined field can be designated as a key field. However, it is best to use fields that normally will contain unique data as key fields. Common practice is to set up the first field as a key field.
A key field can be defined which consists of two or more fields. If the fields which make up this key field are not adjoining (i.e. one after the other), this is called a SEGMENTED KEY FIELD. Key fields consisting of two or more fields, whether segmented or not, must have a length that equals the total length of all the segments that make up the key field.
Sheerpower can extract records using a segmented key.
A record has the following field definitions:
| Example 16-13 Defining Key Fields |
|---|
|
|
-
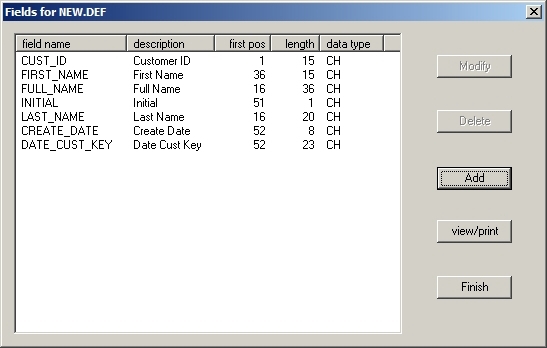
To define a SEGMENTED KEY that consists of CREATE_DATE plus CUSTOMER_ID, you would define another field, DATE_CUST_KEY, that starts at the first position of the first segment of the key with the length being the sum of the lengths of all of the segments:
| Example 16-14 Defining A Segmented Key Field |
|---|
|
|
-
To extract data using this key:
     EXTRACT STRUCTURE customer,  FIELD date_cust_key: partial key "20150201"
             .
             .
      END EXTRACT
The above statement would extract all CUSTOMER records created on 2/1/2015.
16.3.2 Modifying an Existing Data Field
-
To modify an existing data field in a structure definition, enter SETUP and select the table to be modified. See Section 16.1.1, Entering SETUP for details on how to enter SETUP.
Click on [Properties].
The currently defined data fields will be displayed.
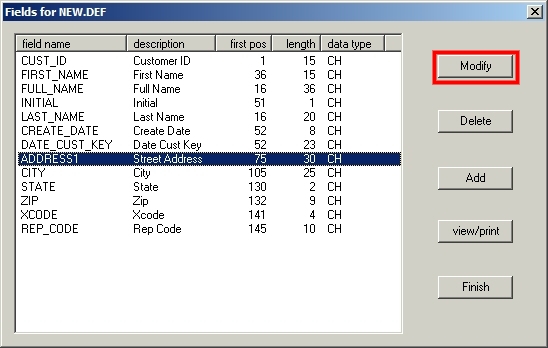
Click on the data field that you want to modify . The [MODIFY] button will then become available.
| Example 16-15 Modifying an Existing Field |
|---|
|
|
-
When you click on [MODIFY] the Field Definition window will appear. All input fields except the field name can be modified. See Section 16.3.1, Data Field Definitions for details on the various data field information options.
Caution must be taken if you modify the field starting position and field length as your new starting position and length may overlap other data in the record. Other fields may also need to be modified for correct starting positions and lengths.
16.3.3 Deleting Field Information
-
If you need to delete an existng data field in a table definition, enter SETUP and select the table to be modified. See Section 16.1.1, Entering SETUP for details on how to enter SETUP.
Click on [Properties].
The currently defined data fields will be displayed.
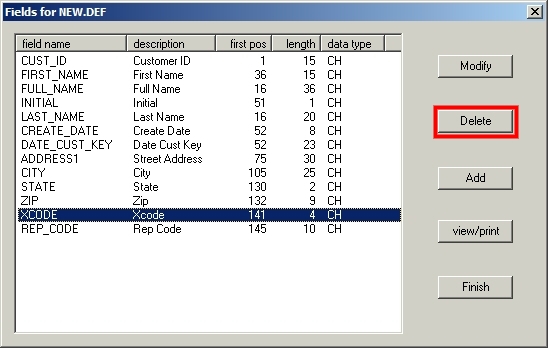
Click on the data field that you want to delete and the [Delete] button will become available.
| Example 16-16 Deleting an Existing Field in SETUP |
|---|
|
|
-
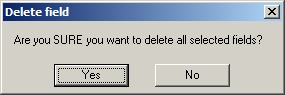
You will then be prompted to confirm the deletion of this data field:
| Example 16-17 Deleting an Existing Data Field |
|---|
|
|
-
Choosing NO will return you to the Field Definition window.
Choosing YES will immediately delete the selected field.
Note:
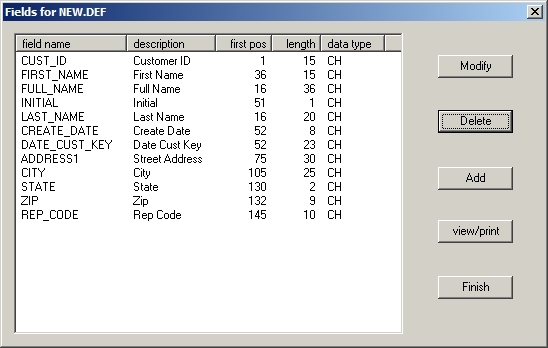
Deleting a data field contained in the file does NOT reposition the following data fields.In the example above we deleted the field XCODE. We now have a record layout that looks like this:
| Example 16-18 Deleting an Existing Field in SETUP |
|---|
|
|
-
Note that field ZIP starts at position 132 for a length of 9 and field REP_CODE starts at position 145 for a length of 10. There is a gap between the two fields where the deleted field had been.
| Previous | Next | Contents | Index |