tm SheerPower is a registered trademark of Touch Technologies, Inc.® VMS is a registered trademark of Digital Equipment Corporation. |
Touch Technologies, Inc. (TTI) has prepared this publication for use by TTI personnel, licensees, and customers. This information is protected by copyright. No part of this document may be photocopied, reproduced or translated to another language without prior written consent of Touch Technologies, Incorporated.
TTI believes the information described in this publication is accurate and reliable; much care has been taken in its preparation. However, no responsibility, financial or otherwise, is accepted for any consequences arising out of the use of this material.
The information contained herein is subject to change without notice and should not be construed as a commitment by Touch Technologies, Inc.
Revised: March 23, 2005
| Contents | Index |
This document describes the programming, testing and other procedural standards used by Touch Technologies, Inc (TTI). The document serves to present the standards used by TTI's programmers. The standards as outlined here are used by all TTI programmers when writing and revising code.
These standards have been developed in order to facilitate the writing and maintaining of code. Use of the standards in this manual will provide the following:
This manual is written for experienced programmers who write new programs and modify existing code.
All SheerPower manuals are designed to provide information in a manner that is concise and easy to use. The manuals are:
This chapter describes the standards for implementing new code. The standards described in this chapter apply to any new programs written and to ANY and ALL modifications made to existing code.
The goal of implementing these standards is to make the code more maintainable by:
The standards make it easier to conduct and supervise programming projects by providing set procedures and coding standards. The structure of the code allows the programmer to easily find pertinent parts of code, and to ignore irrelevant items.
The standards encourage an outline format for programs. The outline format looks something like this:
| Example 1-1 Program Outline Format |
|---|
  Program Definitions
      |
  Initialization
      |
  Main Logic
      |
  First Routine
      |
  Other Major Routines
      |
  Minor Routines
|
The standards in this manual do not dictate that minor routines must fall after major routines. However, they do require that all subroutines appear after the routine which calls them.
If the programmer prefers to put subroutines closer to the routines which call them, the following format could be used:
| Example 1-2 Optional Program Format Outline |
|---|
  Program Definitions
      |
  Initialization
      |
  Main Logic
      |
  First Routine
     Subroutines from first routine
      |
  Major Routine
     Subroutines from major routine
      |
  Major Routine
     Subroutines from major routine
      .
      .
      .
|
With either format, the object is to provide code which is easy to read and easy to modify. These goals are furthered by the requirement that all routines be 25 lines or fewer in length. 25 lines is the number of lines which can be viewed at one time on most laptop monitors.
Small routines encourage the programmer to keep routines simple. A small routine simply cannot do too much. Because of that, it must be very concise and can serve only a specific function. When a programmer is debugging or modifying a program, it easy to see what the routine is doing--because it is only doing 25 lines of material.
Since the routines are so specific, it is easy to decide whether a given routine or any of its subroutines could be creating the bug. In this way, the programmer can scan through the program from top to bottom and quickly pinpoint the area where the bug is occurring.
The standards require that routines be written in the same format. This helps make the code cohesive. It also means that when a team of programmers is working together, or when a new programmer takes over for a departing programmer, everyone knows what to expect. Everything has the same format so there won't be any surprises. New programmers will not have to spend large amounts of time learning the quirks and styles of other individuals.
The formats for the programs and routines are designed to highlight important points and make them more visible. This again makes it easier for the programmer to spot important differences between routines. Headers are highly visible so the programmer doesn't have to search for where the code begins and ends within the routine.
The goal of imposing standards with regard to programs and routines is to make them uniform, readable and understandable. Uniform standards make it easier to read routines and to locate information. The standards are designed to highlight important information and sections in the code.
Each program begins with a program header. The first line of the program is a comment line of percent signs:
!%%%%%%%%%%%%%%%%%%%%%%%%%%%%%%%%%%%%%%%%%%%%%%%%%%%%%% |
The percent line should consist of an exclamation mark followed by 65 percent signs.* The next few lines are comments containing information about the program. The following topics should be included:
Program --- the program name
System --- the package or system the program is a part of (if any)
Author --- the programmer's name
Date --- the date the program was created
Purpose --- a description of the purpose of the program
All the topics should be preceded by the topic title and indented evenly. The program header should end with another percent line. Below is an example of a correctly formatted program header:
| Example 1-3 Program Header Format |
|---|
!%%%%%%%%%%%%%%%%%%%%%%%%%%%%%%%%%%%%%%%%%%%%%%%%%%%%% ! Program: NODEF ! System : IBIS ! Author : John Matthew ! Date : January 7, 2003 ! Purpose: Remove function definitions from ! a basic source file and insert ! include statements !%%%%%%%%%%%%%%%%%%%%%%%%%%%%%%%%%%%%%%%%%%%%%%%%%%%%%% |
* Examples in this manual may have fewer than 65 percent signs because of margin considerations.
Below is an example of a correctly formatted Initialization Area:
| Example 1-4 Initialization Area |
|---|
!%%%%%%%%%%%%%%%%%%%%%%%%%%%%%%%%%%%%%%%%%%%%%%%%%
!         I n i t i a l i z a t i o n
!%%%%%%%%%%%%%%%%%%%%%%%%%%%%%%%%%%%%%%%%%%%%%%%%%
sh_file$ = "c:\sheerpower\spproject\data.html"
round_amount = .005
    .
    .
    .
|
This is where you declare variables or dimension arrays--filling them with initial values. For example, if the year 1955 was used as a SPECIAL YEAR throughout the program:
special_year = 1955 |
would be placed in the Initialization section of the program template.
Below is an example of a correctly formatted Main Logic Area:
| Example 1-5 Main Logic Area |
|---|
!%%%%%%%%%%%%%%%%%%%%%%%%%%%%%%%%%%%%%%%%%%%%%%%%% ! M a i n L o g i c A r e a !%%%%%%%%%%%%%%%%%%%%%%%%%%%%%%%%%%%%%%%%%%%%%%%%% check_files . . . stop |
The Main Logic Area contains all of the code that is not initialization code and is not in a routine.
See Section 5.1, GOLD/P Program Template for instructions on how to automatically create a professional program template using a specially mapped keystroke in SPDEV.
All routines have the same format and are placed under a Routines heading. The format for a routine is:
| Example 1-6 Routine Format |
|---|
!%%%%%%%%%%%%%%%%%%%%%%%%%%%%%%%%%%%%%%%%%%%%%%%%%%%%%% ! R o u t i n e s !%%%%%%%%%%%%%%%%%%%%%%%%%%%%%%%%%%%%%%%%%%%%%%%%%%%%%% !%%%%%%%%%%%%%%%%%%%%%%%%%%%%%%%%%%%%%%%%%%%%%%%%%%%%%% ! r o u t i n e _ n a m e !%%%%%%%%%%%%%%%%%%%%%%%%%%%%%%%%%%%%%%%%%%%%%%%%%%%%%% ! ! Brief description: ! description of routine ! ! Expected: ! variables that need to be set for this routine to ! execute ! ! Locals: ! local variables used in routine ! ! Results: ! result of routine, and variables set up in this ! routine ! !%%%%%%%%%%%%%%%%%%%%%%%%%%%%%%%%%%%%%%%%%%%%%%%%%%%%%% routine routine_name --- --- body of routine --- end routine |
The object of having standards for the format of routines is to make the routines easier to find, follow and maintain. Strict standards are enforced. They ensure that the same format is used, regardless of which programmer wrote the routine. They also ensure that the pertinent information is provided with each routine. Each routine will consist of the following:
Below is an example of a correctly formatted routine header and routine:
| Example 1-7 Correctly Formatted Routine |
|---|
!%%%%%%%%%%%%%%%%%%%%%%%%%%%%%%%%%%%%%%%%%%%%%%%%%%%%%% ! p r i n t _ g r a n d _ t o t a l s !%%%%%%%%%%%%%%%%%%%%%%%%%%%%%%%%%%%%%%%%%%%%%%%%%%%%%% ! ! Brief description: ! This routine display the totals for the sales ! report. ! ! Expected: ! t_parts = total number of parts sold ! t_sales = total sales in dollars and cents ! aup = average unit price: t_sales/t_parts ! ! Locals: ! ! Results: ! tot_printed = true ! !%%%%%%%%%%%%%%%%%%%%%%%%%%%%%%%%%%%%%%%%%%%%%%%%%%%%%% routine print_grand_totals print #report_ch print #report_ch: tab(50); "Total parts: "; t_parts print #report_ch: tab(50); "Total sales: "; t_sales print #report_ch: tab(50); "Average unit price: "; aup let tot_printed = true end routine |
Each routine begins with a header. The header is bordered by two lines of percent signs and contains the routine name and any necessary descriptions. The routine name must be unique and contain at least one underscore "_".
Below is an example of a sample routine header:
| Example 1-8 Sample Routine Header |
|---|
(1)!%%%%%%%%%%%%%%%%%%%%%%%%%%%%%%%%%%%%%%%%%%%%%%%%%%%%%% (2)! p r i n t _ g r a n d _ t o t a l s (3)!%%%%%%%%%%%%%%%%%%%%%%%%%%%%%%%%%%%%%%%%%%%%%%%%%%%%%% ! (4)! Brief description: ! This routine displays the totals for the sales ! report. ! (5)! Expected: ! t_parts = total number of parts sold ! t_sales = total sales in dollars and cents ! aup = average unit price: t_sales/t_parts ! (6)! Locals: ! (7)! Results: ! tot_printed = true ! !%%%%%%%%%%%%%%%%%%%%%%%%%%%%%%%%%%%%%%%%%%%%%%%%%%%%%% |
The purpose of having a standardized header is to:
* Examples in this manual may have fewer than 65 percent signs because of margin considerations.
See Section 5.2, GOLD/R Routine Header Template Keystroke for instructions on automatically creating a routine template using a specially mapped keystroke in SPDEV.
The routine name appears directly under the header.
The body of the routine must be indented two spaces beyond the header and routine name.
The end routine statement should be the last statement in the routine.
| Example 1-9 Routine Name and Body |
|---|
routine print_grand_totals: print #report_ch print #report_ch: tab(50); "Total parts: "; t_parts print #report_ch: tab(50); "Total sales: "; t_sales print #report_ch: tab(50); "Average unit price: "; aup let tot_printed = true end routine |
Programs will be written in a top down format. The routines will follow each other lexically and be of a modular format. The following basic rules apply to programs and routines:
Keeps routine logic simple.
One operation/idea per routine is the easiest to follow. The single most important point about program structure is to put each small "concept" within the program into a separate routine. Use subroutines as a packaging mechanism to organize the individual thoughts and concepts in the program. How small a concept is will be subjective, but the smaller the thoughts or concepts you break a program into, the more successful you will be writing code.
| Example 1-10 Keeping Routine Logic Simple |
|---|
!%%%%%%%%%%%%%%%%%%%%%%%%%%%%%%%%%%%%%%%%%%%%%%%%%
!         I n i t i a l i z a t i o n
!%%%%%%%%%%%%%%%%%%%%%%%%%%%%%%%%%%%%%%%%%%%%%%%%%
      .
      .

!%%%%%%%%%%%%%%%%%%%%%%%%%%%%%%%%%%%%%%%%%%%%%%%%%
!         M a i n   L o g i c   A r e a
!%%%%%%%%%%%%%%%%%%%%%%%%%%%%%%%%%%%%%%%%%%%%%%%%%
  ask_generic_filename
      .
      .
stop

!%%%%%%%%%%%%%%%%%%%%%%%%%%%%%%%%%%%%%%%%%%%%%%%%%
!         R o u t i n e s
!%%%%%%%%%%%%%%%%%%%%%%%%%%%%%%%%%%%%%%%%%%%%%%%%%

!%%%%%%%%%%%%%%%%%%%%%%%%%%%%%%%%%%%%%%%%%%%%%%%%%
!  a s k _ f o r _ a _ f i l e n a m e
!%%%%%%%%%%%%%%%%%%%%%%%%%%%%%%%%%%%%%%%%%%%%%%%%%
!
! Brief description:
!   This routine asks for a generic filename (one
!   which may include wildcards).
!
! Expected:
!      .
!      .
|
When calling a subroutine, the subroutine must lexically follow the routine which calls it.
Ensures that top down programming will occur. This encourages an outline form whereby routines are ordered from major to minor.
| Example 1-11 Order of Routines |
|---|
!%%%%%%%%%%%%%%%%%%%%%%%%%%%%%%%%%%%%%%%%%%%%%%%%%
!         I n i t i a l i z a t i o n
!%%%%%%%%%%%%%%%%%%%%%%%%%%%%%%%%%%%%%%%%%%%%%%%%%

!%%%%%%%%%%%%%%%%%%%%%%%%%%%%%%%%%%%%%%%%%%%%%%%%%
!    M a i n   L o g i c   A r e a
!%%%%%%%%%%%%%%%%%%%%%%%%%%%%%%%%%%%%%%%%%%%%%%%%%
  ask_generic_filename
      .
      .
stop

!%%%%%%%%%%%%%%%%%%%%%%%%%%%%%%%%%%%%%%%%%%%%%%%%%
!         R o u t i n e s
!%%%%%%%%%%%%%%%%%%%%%%%%%%%%%%%%%%%%%%%%%%%%%%%%%

!%%%%%%%%%%%%%%%%%%%%%%%%%%%%%%%%%%%%%%%%%%%%%%%%%
!  a s k _ g e n e r i c _ f i l e n a m e
!%%%%%%%%%%%%%%%%%%%%%%%%%%%%%%%%%%%%%%%%%%%%%%%%%
!
! Brief description:
!   This routine asks for a generic filename (one
!   which may include wildcards).
!           .
!           .
!           .
!%%%%%%%%%%%%%%%%%%%%%%%%%%%%%%%%%%%%%%%%%%%%%%%%%
routine ask_generic_filename
      .
      .
      .
end routine
|
See Section 5.4, GOLD/O to Organize Routines for instructions on how to automatically order your routines using a specially mapped keystroke in SPDEV.
The body of the routine may not exceed 25 lines. Note: The lines from the line following the routine name, up to the line consisting of the end routine command, constitute the body of the routine.
During debugging, and where debugging code is used in the routine, this rule may be violated. However, debug code should be removed when the final routine is finished.
25 is the number of lines that can appear at one time on most laptop monitors. This makes it easier to read and to follow the code. It will also ensure that the code is simple, straightforward and extremely modular.
If a routine is trying to do too much, this rule will require that it be broken into several smaller routines. Programmers will be less likely to make mistakes if the code is shorter and can be viewed on one screen.
| Example 1-12 Routine Length |
|---|
!%%%%%%%%%%%%%%%%%%%%%%%%%%%%%%%%%%%%%%%%%%%%%%%%
!  c h e c k _ l i n e
!%%%%%%%%%%%%%%%%%%%%%%%%%%%%%%%%%%%%%%%%%%%%%%%%
!
! Brief description:
!        .
!        .
! Expected:
!        .
!        .
!%%%%%%%%%%%%%%%%%%%%%%%%%%%%%%%%%%%%%%%%%%%%%%%%%
routine check_line
  filinx = filinx + 1
  file$ = findfile$(generic_file$, filinx)
  if  file$ = ''  then  done = true
  if  not done  then
    file$ = element$(file$,1,';')
    message 'Working on ' + file$    !++ debug jm ++
  end if
end routine
|
The routine in the example below is longer than 25 lines and must therefore be broken into two or more smaller routines:
| Example 1-13 Long Routine |
|---|
!%%%%%%%%%%%%%%%%%%%%%%%%%%%%%%%%%%%%%%%%%%%%%%%%
!  c h e c k _ l i n e
!%%%%%%%%%%%%%%%%%%%%%%%%%%%%%%%%%%%%%%%%%%%%%%%%
!
! Brief description:
!   This routine has two functions:
!     1. To keep track of the current and previous
!        line numbers to determine whether it is
!        appropriate to insert the %include
!        statement.
!     2. To keep track of whether the text is part
!        of a function definition.  If it is, the
!        flag 'okay' is set to false so that it
!        won't be transferred to the output file.
!
! Expected:
!        .
!        .
!%%%%%%%%%%%%%%%%%%%%%%%%%%%%%%%%%%%%%%%%%%%%%%%%%
routine check_line
  previous_line = ''
  z0 = 0
  line_begin = false
  next_okay = false
  when exception in
    line_nbr = val(text$[1:5])
  use
    line_nbr = 0
  end when
  if  line_nbr > 0  then
    previous_line = current_line
    current_line = line_nbr
    line_begin = true
  end if
  z0 = skip(text$, '0123456789 ')
  if  z0 > 0  then
    if  text$[z0:z0+3] = 'DEF '  then
      okay = false
      elseif  text$[z0:z0+4] = 'FNEND'
      then next_okay = true
      end if
    end if
end routine
|
There are two simple clues that this routine is too long. One, the description states that it does two things. Each routine should do only one thing. Second, it exceeds the 25-line limit.
Below is the routine broken up into two smaller, more understandable routines:
| Example 1-14 Smaller Routines |
|---|
!%%%%%%%%%%%%%%%%%%%%%%%%%%%%%%%%%%%%%%%%%%%%%%%%
!  c h e c k _ l i n e
!%%%%%%%%%%%%%%%%%%%%%%%%%%%%%%%%%%%%%%%%%%%%%%%%
!
! Brief description:
!   This routine is to keep track of the whether
!   the text is part of a function definition.  If
!   it is, the 'okay' flag is set to false so that
!   it won't be transferred to the output file.
!
! Expected:
!        .
!        .
!%%%%%%%%%%%%%%%%%%%%%%%%%%%%%%%%%%%%%%%%%%%%%%%%%
routine check_line
  z0 = skip(text$, '0123456789 ')
  if  z0 > 0  then
    if  text$[z0:z0+3] = 'DEF '  then
      okay = false
    elseif  text$[z0:z0+4] = 'FNEND'  then
      next_okay = true
    end if
  end if
end routine


!%%%%%%%%%%%%%%%%%%%%%%%%%%%%%%%%%%%%%%%%%%%%%%%%
!  c h e c k _ l i n e _ n u m b e r
!%%%%%%%%%%%%%%%%%%%%%%%%%%%%%%%%%%%%%%%%%%%%%%%%
!
! Brief description:
!   Check the text line for a line number and
!   assign it to a variable.  This is so that we
!   can keep track of the current and previous
!   line numbers to determine whether it is
!   appropriate to insert the '%include' statement.
!
! Expected:
!        .
!        .
!%%%%%%%%%%%%%%%%%%%%%%%%%%%%%%%%%%%%%%%%%%%%%%%%%
routine check_line_number
  previous_line = current_line
  line_begin = false
  next_okay = false
  line_nbr = val(element$(text$,1,' '))
  if  line_nbr > 0  then
    previous_line = current_line
    current_line = line_nbr
    line_begin = true
  end if
end routine
|
See Section 5.3, GOLD/R to Create Subroutines for details on how to automatically create a subroutine from within a routine using a specially mapped keystroke in SPDEV.
Where it is necessary to make a routine longer than 25 lines, you must specify in the routine header why it is longer than 25 lines.
Ensures that routines will not be longer than 25 lines whenever possible. (On occasion, for instance where a table is used in a routine, it will be necessary to exceed the 25-line limit.)
| Example 1-15 Commenting Long Routines |
|---|
!%%%%%%%%%%%%%%%%%%%%%%%%%%%%%%%%%%%%%%%%%%%%%%%%%%
!  m a i n _ m e n u
!%%%%%%%%%%%%%%%%%%%%%%%%%%%%%%%%%%%%%%%%%%%%%%%%%%
!
! Brief description:
!   This is the main menu for end of month
!   processing.  This module exceeds standard length
!   because of the case statement.
!
! Expected:
!        .
!        .
!%%%%%%%%%%%%%%%%%%%%%%%%%%%%%%%%%%%%%%%%%%%%%%%%%%
routine main_menu
  display_menu
  do
    input "Enter item:"; choice$
    good_choice = true
    select case choice$
    case 'EOM'
      end_of_month
    case 'EOQ'
      end_of_quarter
    case 'EOY'
      end_of_year
    case 'MTOT'
      monthly_totals
    case 'BALSHT'
      balance_sheet
    case 'INCOME'
      income_stmt
    case 'SALES'
      sales_report
    case 'PROD'
      production_report
    case else
    print "Not a valid choice.  Please re-enter."
    good_choice = false
    end select
  loop until good_choice
end routine
|
Routines should be separated by three blank lines. The last line of the routine (the line containing the end routine statement) should be followed by three blank lines, then the header line for the next routine.
Makes routines easily visible and more readable, and to make searches easier.
   .
   .
   .
end routine


!%%%%%%%%%%%%%%%%%%%%%%%%%%%%%%%%%%%%%%%%%%%%
!  c l o s e _ o u t
    .
    .
    .
|
The following rules apply to all code written. Programs, routines, and revisions to current code must comply with these rules.
All code will be written in lower case. No upper case letters are allowed except in documentation and within quotes.
Makes code easy to read.
| Example 1-16 Writing Code in Lower Case |
|---|
print #report_ch print #report_ch: tab(50); "Total parts: "; t_parts print #report_ch: tab(50); "Total sales: "; t_sales print #report_ch: tab(50); "Average unit price: "; aup |
See Section 5.10, GOLD/DOWN and UP Arrow to Change Case for instructions on how to automatically convert all unquoted code/text to lower case using a specially mapped keystroke in SPDEV.
Variable names should closely resemble their function. Some variables are automatically initialized, so there is no need to initialize them within your code. However, some programs consist of many modules that will not be initialized automatically.
Makes it easy to tell the purpose of the variable.
| Example 1-17 Variable Names |
|---|
    Line_counter            Line counter

    Page_counter            Page counter

    database_engine_menu    Database engine menu

    student_name            Student name
|
Make use of SheerPower internal variables; i.e., _BACK, _EXIT, _HELP.
These are automatically set and cleared by SheerPower.
| Example 1-18 SheerPower Internal Variables |
|---|
  do
    input 'Please enter your name' : name$
    if  _exit  then
    print '_exit is set to true'
    exit do
    end if
  loop
  end
|
Always line up "=" signs.
When declaring variables, listing them alphabetically makes them easy to find. Initialize variables at the top of the routine.
| Example 1-19 Lining Up " =" Signs in Routines |
|---|
html_dailystats$ = "c:\sheerpower\dailystats.html" temp_dailystats$ = "c:\sheerpower\dailystats.tmp" html_camstats$ = "c:\sheerpower\camstats.html" temp_camstats$ = "c:\sheerpower\camstats.tmp" html_sitestats$ = "c:\sheerpower\sitestats.html" temp_sitestats$ = "c:\sheerpower\sitestats.tmp" temp_caminfo$ = "c:\sheerpower\camera_info.tmp" text_caminfo$ = "c:\sheerpower\camera_info.txt" |
See Section 5.5, GOLD/A to Align Equal Signs "=" for instructions on how to automatically line up "=" in your code using a specially mapped keystroke in SPDEV.
Debug code includes debug statements and code used in the process of debugging. Debug code should be removed from the final version of any routine, once the bugs have been found and resolved.
Two blank lines must appear both before and after each block of debug code.
Ensures visibility and provides an easy way to search for debug code.
| Example 1-20 Debug Code |
|---|
open #in_ch: name file$ !out$=element$(file$,1,".BAS")+".NOD" !++ debug jrm ++ out$ = 'TT:' !++ debug jrm ++ open #out_ch: name out$, access output |
Every line of debug code must be specially noted. Code which is added for debugging purposes must be designated with a comment at the end of each line of debug code. The comment should look like this:
| Example 1-21 Debug Code |
|---|
!++ debug programmers_initials ++ |
The !++ and the word "debug" indicates that this is debug code. The programmer's initials should follow, and then another set of double plus signs.
This designation will clearly mark debug code, and specify the programmer who performed the debugging in case they need to be contacted. The !++ provides a unique search text to use with the SPDEV FIND function. The programmer can search for leftover debug code by performing a FIND using either the FIND button in the toolbar, or by pressing Ctrl/F.
They can then delete just the debug code lines rather than a block of code (and possibly deleting non-debug code, as well).
| Example 1-22 Debug Code |
|---|
open #in_ch: name file$ !out$=element$(file$,1,".BAS")+".NOD" !++ debug jrm ++ out$ = 'TT:' !++ debug jrm ++ open #out_ch: name out$, access output |
See Section 5.6, GOLD/C to Insert Debug Comment Line for instructions on how to automatically generate debug comments using a specially mapped keystroke in SPDEV.
Structures should be opened and closed only once in a program.
The overhead of opening and closing files is wasteful.
Screen prompts should be located at the bottom left side of the screen. They should use a question mark instead of a colon prompt.
Ensures that the prompts can be easily found.
Input information should be displayed to screen in BOLD after the information has been input.
Makes user-entered data stand out from the screen background.
line input at 21, 1, prompt 'Name?' length 30, erase: reply$ print bold, at 3, 15, erase: reply$ |
Use boolean variables (indicated by a trailing "?") as TRUE/FALSE flags.
Clarifies that the variable is a flag and not a quantity.
  do
    line input #in_ch, eof got_eof?: rawdata$
    if got_eof? then exit do
    print rawdata$
  loop
|
Strict indentation rules will be enforced in any code. Consistent indentation rules make it easier to do searches and global replacements. They also make the code easier to read and therefore easier to maintain. The following rules apply:
Code should be indented 2 spaces underneath the routine name.
Makes code neater, which is easier to read and follow. Additionally, searches will be easier as the number of spaces is predictable.
| Example 1-23 Code Indentation |
|---|
routine print_report print #report_ch print #report_ch: tab(50); "Total parts: "; t_parts print #report_ch: tab(50); "Total sales: "; t_sales print #report_ch: tab(50); "Average unit price: "; aup end routine |
See Section 5.11, Tab Key to Indent for instructions on how to easily adjust code indentation using a specially mapped keystroke in SPDEV.
IF THEN statements must contain two spaces between the IF and the condition, and two spaces between the condition and the THEN. If a block construct IF THEN is used, the block of code must be indented two spaces under the IF THEN statement.
Makes code neater and easier to read. Also makes searches easier.
| Example 1-24 IF THEN Statement Spacing and Indentation |
|---|
  if  text$[z0:z0+3] = 'DEF '  then
    okay = false
  elseif  text$[z0:z0+4] = 'FNEND'  then
    next_okay = true
  end if
|
Where several conditions are specified in an IF THEN statement, the following format is to be used:
| Example 1-25 IF THEN Format |
|---|
  if  condition  operator &
      condition  then
    ---
    --- block of code
    ---
  end if
|
For example:
| Example 1-26 IF THEN Format with Multiple Conditions |
|---|
  if  (previous_line < include_line_nbr)  and &
      (current_line  > include_line_nbr)  and &
      (line_begin    = true)  then
    print #out_ch: iline$; '%include cursor_def.inc'
    print #out_ch: '        %include common_def.inc'
    print #out_ch: '        %include misc_def.inc'
    print #out_ch:
  end if
|
IF THEN statements should not be nested. Avoid more than 3 levels of indentation (nested LOOPS and IFs, etc.) to keep the code in that routine from becoming too complex. If there are more, then an inner loop should be moved out to a new routine. Keeping the indentation to no more than 3 levels keeps the code looking neat, clean, and easy for the reader to follow.
Keeps coding easy to understand for later enhancements.
The block of code under loops and within routines must be indented two spaces under the beginning statement.
Makes code neater and easier to read. Also makes searches easier.
| Example 1-27 Code Block Indentation |
|---|
routine do_total
  for i = 1 to 10
    total(i) = 0
  next i
end routine
|
See Section 5.11, Tab Key to Indent for instructions on how to easily adjust code indentation using a specially mapped keystroke in SPDEV.
Continuation lines (those that follow an & or + on the previous line) must be indented 4 spaces beyond the normal indentation level for that section of code.
Makes code neater and easier to read.
| Example 1-28 Continuation Indentation |
|---|
  if  (previous_line < include_line_nbr)  and &
      (current_line  > include_line_nbr)  and &
      (line_begin    = true)  then
      print #report_ch: 'Total sales for this month = '; &
          tot_sales
  end if
|
See Section 5.8, GOLD/F to Fixup Right Margin for instructions on how to fixup the right margins (word wrap) of your code using a specially mapped keystroke in SPDEV.
Avoid using ELSE in conditional constructs if a separate IF THEN statement will make future enhancements to the code simpler. For example, a program that is 25,000 lines of code (including comments) might have approximately 20 ELSEs compared to over a thousand IFs. This illustrates how rare an IF ELSE should be.
If an IF ELSE is necessary, the IF should be the short line of code and the ELSE the long line.
Makes future code enhancements easier.
The block of code in FOR NEXT loops must be indented two spaces under the FOR.
Makes code neater and easier to read. Also makes searches easier.
| Example 1-29 FOR NEXT Loop Indentation |
|---|
  for i = 1 to 99999
    get_line
    if  eof?  then exit for
    check_line
    write_line
  next i
|
Use parentheses around every set of operations.
This will make it absolutely clear how you intend the code to be executed, without depending on the order of precedence of operators.
| Example 1-30 Use of Parentheses |
|---|
! DO: if ((a > ( b * c)) or ((d + 4) = f)) then x = x + 1 // with parentheses ! Instead of: if a > b * c or d + 4 = f then x = x + 1 // without parentheses |
Variable names should closely resemble their function.
Makes it easy to tell the purpose of the variable.
| Example 1-31 Variable Names |
|---|
        Line_counter            Line counter

        Page_counter            Page counter

        database_engine_menu    Database engine menu

        student_name            Student name
|
Split a long line logically.
Shorter lines are easier to follow.
| Example 1-32 Short Lines of Code |
|---|
! DO:

  open structure payroll: name "c:\sheerpower\my_payroll_master",
   access outin

! instead of:

  open structure payroll: name "c:\sheerpower\my_payroll_master", access +
    outin
|
See Section 5.8, GOLD/F to Fixup Right Margin for instructions on how to automatically wrap long lines of code at the right margin using a specially mapped keystroke in SPDEV.
Temporary variables and arrays will be single letter variables. They may also be a single letter followed by a number. Note: A temporary variable is one which is used in only one routine. Temporary variables cannot span more than one routine.
Makes it easy for the programmer to distinguish temporary (and therefore less important) variables in routines.
| Example 1-33 Temporary Variables as Single Letters |
|---|
for (1)i = 1 to 99999 get_line if eof then exit for check_line next i |
Underscores are used as separators in all variable names, labels, etc.
Ensures readability and conformity with other BASICs.
| Example 1-34 Underscores as Separators |
|---|
(1)skip_lines: if (2)skip_lines then for z = 1 to 5 print (3)#report_ch next z end if |
This chapter describes standards for routine naming conventions used in coding.
2.1 Naming Conventions
Names for certain types of routines must follow specific naming
conventions. For example, routines whose purpose is to print data to an
output file will carry the name PRINT_output filename.
The purpose of providing naming standards is to make the code clearer and to make searches within the code easier. For example, every time the programmer encounters a routine with the name PRINT_filename, it will be clear that the routine's purpose is to print data to an output file. Moreover, if the programmer needs to search for a print routine, a search can be done for the prefix "PRINT_" and the filename, if it is known.
2.2 Standard Naming Prefixes
The prefixes for routine names given in the manual must be used in
creating routine names. The prefixes given should cover all program
procedures.
These prefixes are standardized according to the rules below, and will help identify the types of routines and make searches easier. The unique text following the prefix will identify the individual routines.
The following conventions will be used in naming routines.
Routines that ask for a yes or no response will carry the "ASK_" prefix followed by identifying text (for instance, what the routine asks).
| Example 2-1 ASK_ Prefix |
|---|
  Examples:  ask_restoring
             ask_active
             ask_guidance_flag
|
Routines that perform calculations will carry the "CALC_" prefix followed by identifying text (for instance, what is being calculated).
| Example 2-2 CALC_ Prefix |
|---|
  Examples:  calc_mm_short_limit
             calc_customer_line
             calc_mmloan
|
Routines that do processing will carry the "DO_" prefix followed by identifying text (for instance, what processes the routine does).
| Example 2-3 DO_ Prefix |
|---|
  Examples:  do_sale_limit
             do_fwd_total_limit
             do_credit_amount
|
Routines that ask the user to enter text will carry the "ENTER_" prefix followed by identifying text (for instance, what is being entered).
| Example 2-4 ENTER_ Prefix |
|---|
  Examples:  enter_inst
             enter_instrument
             enter_cd_amount
|
Routines that get a record will carry the "GET_" prefix followed by identifying text (for instance, what record the routine gets).
| Example 2-5 GET_ Prefix |
|---|
  Examples:  get_count
             get_input
             get_fxco_record
|
Routines that open or begin the routine will carry the "OPEN_" prefix followed by identifying text.
| Example 2-6 OPEN_ Prefix |
|---|
  Examples:  open_file
             open_table
             open_fxaudi
|
Routines that print to an output file will carry the "PRINT_" prefix followed by a description of the data.
| Example 2-7 PRINT_ Prefix |
|---|
  Examples:  print_header,
             print_indiv_info
             print_images
|
Routines that print information to the screen will carry the "SHOW_" prefix followed by identifying text (for instance, what is printed to the screen).
| Example 2-8 SHOW_ Prefix |
|---|
  Examples:  show_screen
             show_deal_limit
             show_oprt_password
|
Routines that store data in a buffer will carry the "STORE_" prefix followed by a description of the data.
| Example 2-9 STORE_ Prefix |
|---|
Example: store_audit_info |
Routines that initialize will carry the "INITIALIZE_" prefix followed by a description of the data.
| Example 2-10 INITIALIZE_ Prefix |
|---|
Example: initialize_data_info |
Changes made to any source code or new programs will follow the standards explained in Chapters 1 and 2 of this document as well as the following general standards.
Line 1 of all new programs will consist of a correctly formatted header. The header information will include the program name, package name, author, date, work request number and purpose. The following is an example of the correct format:
| Example 3-1 Program Header Format |
|---|
!%%%%%%%%%%%%%%%%%%%%%%%%%%%%%%%%%%%%%%%%%%%%%%%%%%%%%% ! Program: CF_LIST_DATA ! System : ! Author : John Doe ! Company: TTI ! Date : January 11, 2000 ! Purpose: List data from a file according to the ! user's selections. !%%%%%%%%%%%%%%%%%%%%%%%%%%%%%%%%%%%%%%%%%%%%%%%%%%%%%% |
See Section 5.1, GOLD/P Program Template for instructions on how to automatically create a professional program template using a specially mapped keystroke in SPDEV.
If the new program is a modified version of an existing program, the new program will be modified to contain the correct header.
All programs that are modified will contain documentation of the modification in line 1. This will include the author, date, work request number and purpose. Initials may be eliminated from each line of modified code in cases of extensive modifications. This can be done as long as there is a narrative description in the modification history.
The following is an example of modification documentation:
| Example 3-2 Modification Documentation |
|---|
!%%%%%%%%%%%%%%%%%%%%%%%%%%%%%%%%%%%%%%%%%%%%%%%%%%%%%% ! Program: CF_LIST_DATA ! System : ! Author : John Doe ! Company: TTI ! Date : January 11, 2000 ! Purpose: List data from a file according to the ! user's selections. !%%%%%%%%%%%%%%%%%%%%%%%%%%%%%%%%%%%%%%%%%%%%%%%%%%%%%% !%%%%%%%%%%%%%%%%%%%%%%%%%%%%%%%%%%%%%%%%%%%%%%%%%%%%%% ! Modification History ! Author : Jane Doe ! Date : January 17, 2000 ! Purpose: Change list format to fit on standard ! 8 1/2 by 11 forms. !%%%%%%%%%%%%%%%%%%%%%%%%%%%%%%%%%%%%%%%%%%%%%%%%%%%%%% !%%%%%%%%%%%%%%%%%%%%%%%%%%%%%%%%%%%%%%%%%%%%%%%%%%%%%% ! Modification History ! Author : John Doe ! Date : January 27, 2000 ! Purpose: Add a user selection to print to slave ! printer. !%%%%%%%%%%%%%%%%%%%%%%%%%%%%%%%%%%%%%%%%%%%%%%%%%%%%%% |
Routine headers and comments will be implemented as explained in Chapters 1 and 2 of this document.
If the new program is a modified version of an existing program, any changed or added code must follow the standards. Code not touched does not need to be standardized unless the author wishes to do so.
Added routines will contain the correct header information and comments as explained in Chapters 1 and 2 of this document.
Lines of code that are changed or added shall be in lower case and commented. The comments will contain the author's initials, work request number and explanation of the change. At least one blank line should separate added code from existing code. The following is an example of changed or added code:
| Example 3-3 Changed or Added Code |
|---|
print "STARTING PROGRAM AT"; time$ call print_a_list !++ call program to print the list to hardcopy !++ jd wr# IBS-8703102 print "PROGRAM FINISHED AT"; time$ |
If comments are made as a block comment, programmer initials do not have to be on each line of comments.
If portions of old code are copied for use in a program, it is considered "fast typing" and the copied code must be brought to standards.
The major to minor rule for subroutines may not be violated. Error routines should perform minimal processing. Subroutine calls should not be embedded within the error handling routine. See Chapter 1 for a full explanation of major and minor routines.
When it is necessary to print an error message, as much information as possible should be displayed to help the user determine why the error occurred. In the following example, the error message contains the name of the product that was not found:
| Example 3-4 Error Messages |
|---|
!%%%%%%%%%%%%%%%%%%%%%%%%%%%%%%%%%%%%%%%%%%%%%%%%%%%%
routine get_product
  set structure s1, field product: key product$
  if  _extracted = 0  then
    message error: 'Product ' + product$ + ' not found'
  end if
end routine
|
A number that is critical to the operation of the program is known as an "important constant." An example might be .005 which is used in rounding. These numbers must be stored into a variable at the beginning of the program. The variable must then be used for all subsequent code references. For example:
| Example 3-5 Storing Critical Numbers into Variables |
|---|
round_amount = .005 |
If the number needs to be changed at any time, it is easily found and changed in one place without having to search through the program looking for all occurrences.
When an operation is performed on data files, such as open, print, close, etc., the channel numbers must be variables that distinguish which file is being used. This will help to follow the flow of the program. The user is able to see exactly which file is being processed when reading through the source code.
The channel variables are then used in the source code when an operation is performed on a file. Here is an example:
| Example 4-1 Using Channel Variable Names |
|---|
open file report_ch : name 'sheerpower:report.txt', access output |
In SheerPower Rapid Development Environment (SPDEV), the following keystrokes have been specially mapped to assist programmers to quickly and easily create professional-looking code:
| Keystroke | Function Performed | |
|---|---|---|
| gold/p | create program template | |
| gold/r | create routine template | |
| gold/r | create subroutine from routine | |
| gold/a | align equal signs | |
| gold/c | generate debug comment line of !++ xxx date | |
| gold/d | document routine variables in header | |
| gold/f | fixup right margin (fill/wrap) | |
| gold forward slash | comment or uncomment line or block of code | |
| gold down|up arrow | change all unquoted text/code to be upper or lower case | |
| tab | indent selected text/code 2 spaces | |
| shift+tab | move indentation back 2 spaces on selected text/code |
The GOLD Key referred to in this section is a special key used to create many of the specialized keystrokes within SPDEV. Both the [Esc] (escape key--top left corner of the keyboard) and the [Num-Lock] (numbers lock key in the numeric keypad) are GOLD keys in SPDEV.
To use the GOLD key, press either GOLD key ([Esc] or [Num-Lock]), let go, then continue with the rest of the keystroke to complete the function.
For a complete listing of specially mapped programming keystrokes in SPDEV, see the SheerPower 4GL - A Guide to the SheerPower Language , Appendix F, Keystrokes for SheerPower Rapid Development Environment.
See Appendix H, SPDEV Menu Item Descriptions (under the "Keystroke Function Mappings Option" heading) for details on how to customize your keymap when using SPDEV.
A PROGRAM TEMPLATE can also be created instantly inside a program file by using the GOLD/P keystroke inside SheerPower Rapid Development Environment (SPDEV).
You can change the name and/or company name displayed in the Program Header at any time by clicking on Options in the SPDEV toolbar, then selecting Change System Settings.
| Example 5-1 GOLD/P to Create Program Template |
|---|
!%%%%%%%%%%%%%%%%%%%%%%%%%%%%%%%%%%%%%%%%%%%%%%%%%%%%%%%%%%%%%%%%% ! Program: Sample Program Template ! System : ! Author : my name ! Company: my company name ! Date : October 11, 2003 ! Purpose: ! !%%%%%%%%%%%%%%%%%%%%%%%%%%%%%%%%%%%%%%%%%%%%%%%%%%%%%%%%%%%%%%%%% !%%%%%%%%%%%%%%%%%%%%%%%%%%%%%%%%%%%%%%%%%%%%%%%%%%%%%%%%%%%%%%%%% ! I n i t i a l i z a t i o n !%%%%%%%%%%%%%%%%%%%%%%%%%%%%%%%%%%%%%%%%%%%%%%%%%%%%%%%%%%%%%%%%% !%%%%%%%%%%%%%%%%%%%%%%%%%%%%%%%%%%%%%%%%%%%%%%%%%%%%%%%%%%%%%%%%% ! M a i n L o g i c A r e a !%%%%%%%%%%%%%%%%%%%%%%%%%%%%%%%%%%%%%%%%%%%%%%%%%%%%%%%%%%%%%%%%% stop !%%%%%%%%%%%%%%%%%%%%%%%%%%%%%%%%%%%%%%%%%%%%%%%%%%%%%%%%%%%%%%%%% ! R o u t i n e s !%%%%%%%%%%%%%%%%%%%%%%%%%%%%%%%%%%%%%%%%%%%%%%%%%%%%%%%%%%%%%%%%% end |
In SPDEV, you can bring up a standard routine header template using the specially mapped keystroke GOLD/R. Simply position the cursor at the place in your program where you want to insert a new routine, then press GOLD/R. A routine header dialog box will appear, prompting you to type in the name of your routine and any parameters to include. Once the fields have been completed, click on the OK button. The routine template will appear in your program file. A sample routine template is shown below:
| Example 5-2 GOLD/R to Create Routine Template |
|---|
!%%%%%%%%%%%%%%%%%%%%%%%%%%%%%%%%%%%%%%%%%%%%%%%%%%%%%%%%%%%%%%%%% ! s a m p l e _ r o u t i n e _ t e m p l a t e !%%%%%%%%%%%%%%%%%%%%%%%%%%%%%%%%%%%%%%%%%%%%%%%%%%%%%%%%%%%%%%%%% ! ! Brief description: ! ! ! Expected on entry: ! ! ! Locals used: ! ! ! Results on exit: ! ! !%%%%%%%%%%%%%%%%%%%%%%%%%%%%%%%%%%%%%%%%%%%%%%%%%%%%%%%%%%%%%%%%% routine sample_routine_template end routine |
Often routines can become too long and complicated. SheerPower makes it easy to make SUBROUTINES from within a routine. Just highlight the block of code you want moved into a new subroutine, and press GOLD/R.
The new routine will automatically be created with the highlighted code inside of it. A "call" to the new routine will be inserted inside the original routine where the highlighted code used to be. This makes breaking up long routines much simpler for any programmer.
| Example 5-3 GOLD/R to Create Subroutine |
|---|
  n = 301.84 - 301
  if (n = .84) then
    print 'Perfect Precision'
  else
    print 'Not quite right'
  end if

! Highlight this section of code below
! with your mouse, then press GOLD/R:

  x = 0
  for i = 0 to 1000
    x = x + 0.01
  next i
  z = 10.082 - 0.072
  if (x = z) then
    print 'Perfect Precision'
  else
    print 'Not quite right'
  end if
|
After you press the GOLD/R keystroke, you will be prompted for the name of the new routine and any parameters you wish to include. The highlighted code will then be placed into its own routine, and in its original place the call to the new routine will be inserted as shown below:
  n = 301.84 - 301
  if (n = .84) then
    print 'Perfect Precision'
  else
    print 'Not quite right'
  end if

  sample_subroutine  ! <--CALL to new subroutine


!%%%%%%%%%%%%%%%%%%%%%%%%%%%%%%%%%%%%%%%%%%%%%%%%%%%%%%%%%%%%%%%%%
! s a m p l e _ s u b r o u t i n e
!%%%%%%%%%%%%%%%%%%%%%%%%%%%%%%%%%%%%%%%%%%%%%%%%%%%%%%%%%%%%%%%%%
!
! Brief description:
!
!
! Expected on entry:
!
!
! Locals used:
!
!
! Results on exit:
!
!
!%%%%%%%%%%%%%%%%%%%%%%%%%%%%%%%%%%%%%%%%%%%%%%%%%%%%%%%%%%%%%%%%%
routine sample_subroutine
  x = 0
  for i = 0 to 1000
    x = x + 0.01
  next i
  z = 10.082 - 0.072
  if (x = z) then
    print 'Perfect Precision'
  else
    print 'Not quite right'
  end if
end routine
|
Routines can become logically out of order as a program is being written or modified, making it difficult to follow program logic and to find a given routine.
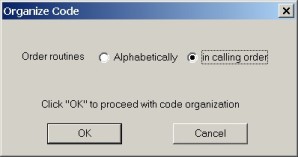
In SPDEV, the GOLD/O keystroke lets you automatically order your routines in either CALLING ORDER or ALPHABETICAL ORDER. The default order in SPDEV is calling order.
To use the GOLD/O keystroke, from anywhere in the program file press either GOLD key (Escape or Num-Lock), let go, then press the O key. A dialog box will appear prompting you to choose the calling order of the routines, as shown below:
Once the calling order is selected, press the OK button to proceed with the routine organization.
To keep routine headers and code neat in appearance and easy to read, alignment of equal signs (=) is important. In SPDEV you can align the equal signs quickly by highlighting the block of code or text containing the equal signs to be aligned, then pressing GOLD/A. This is illustrated in the following example:
| Example 5-4 GOLD/A to Align Equal Signs " =" |
|---|
! To align the = in the example below, highlight all of the ! text containing the = to align with your mouse: !%%%%%%%%%%%%%%%%%%%%%%%%%%%%%%%%%%%%%%%%%%%%%%%%%%%%%%%%%%%%%%%%% ! g e t _ h e a d l i n e !%%%%%%%%%%%%%%%%%%%%%%%%%%%%%%%%%%%%%%%%%%%%%%%%%%%%%%%%%%%%%%%%% ! ! Brief description: ! Go out to www.cnn.com and extract the headline of the top ! news story. ! ! Expected on entry: ! main$ = the starting point of the headline ! begin_form$ = the top HTML code for the dialogbox form ! end_main$= the end point of the headline ! ! Locals used: ! text$ = the HTML code on the CNN website ! crlf$= contains the character line feeds ! state$= tells which action needs to be ! performed next on the incoming data ! ! Results on exit: ! dbox$ = stores the code to create the dialogbox ! ! The headline is found and the form is created. ! !%%%%%%%%%%%%%%%%%%%%%%%%%%%%%%%%%%%%%%%%%%%%%%%%%%%%%%%%%%%%%%%%% |
Now press GOLD/A. SheerPower automatically aligns the = to make the routine header appear neater and easer to read. For example:
!%%%%%%%%%%%%%%%%%%%%%%%%%%%%%%%%%%%%%%%%%%%%%%%%%%%%%%%%%%%%%%%%% ! g e t _ h e a d l i n e !%%%%%%%%%%%%%%%%%%%%%%%%%%%%%%%%%%%%%%%%%%%%%%%%%%%%%%%%%%%%%%%%% ! ! Brief description: ! Go out to www.cnn.com and extract the headline of the top ! news story. ! ! Expected on entry: ! main$ = the starting point of the headline ! begin_form$ = the top HTML code for the dialogbox form ! end_main$ = the end point of the headline ! ! Locals used: ! text$ = the HTML code on the CNN website ! crlf$ = contains the character line feeds ! state$ = tells which action needs to be ! performed next on the incoming data ! ! Results on exit: ! dbox$ = stores the code to create the dialogbox ! ! The headline is found and the form is created. ! !%%%%%%%%%%%%%%%%%%%%%%%%%%%%%%%%%%%%%%%%%%%%%%%%%%%%%%%%%%%%%%%%% |
The same can be done to align = within a block of code as shown below:
| Example 5-5 Aligning " =" in Code |
|---|
! Copy/paste the 3 lines of code below into SPDEV, then ! highlight with your mouse: text$= "Hello there!" a$= "It's another sunny day in paradise here!" value = 10 ! Press GOLD/A to have all the = aligned as follows: text$ = "Hello there!" a$ = "It's another sunny day in paradise here!" value = 10 |
The GOLD/C keystroke inserts a unique debug comment line beside any debug code to make it easy to find later and remove. When this keystroke is first used, a dialog box will appear prompting you for your initials:
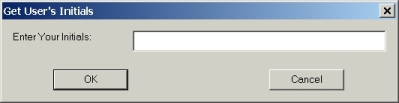
Once the initials are entered, click the OK button. The debug comment will then be inserted where your cursor is inside the program file.
| Example 5-6 GOLD/C to Generate Debug Comment |
|---|
!++ debug sw October 11, 2003 |
The initials placed inside the debug comment line can be changed at any time by clicking on Options in the SPDEV toolbar, then choosing Change System Settings. In the top right corner of the Settings dialog box the Initials field can be edited.
Documenting variables in routines clearly in a routine header is essential to creating professional code. SheerPower makes this simpler with the GOLD/D keystroke. You can create the routine header using the GOLD/R keystroke, write the routine, then document all the variables using GOLD/D. See the following example for how GOLD/D works:
| Example 5-7 GOLD/D to Document Routine Variables |
|---|
! The following routine has been written, but the header has yet to
! have all the routine's variables listed and documented within it:

!%%%%%%%%%%%%%%%%%%%%%%%%%%%%%%%%%%%%%%%%%%%%%%%%%%%%%%%%%%%%%%%%%
!
! Brief description:
!
!
! Expected on entry:
!
!
! Locals used:
!
!
! Results on exit:
!
!
!%%%%%%%%%%%%%%%%%%%%%%%%%%%%%%%%%%%%%%%%%%%%%%%%%%%%%%%%%%%%%%%%%
routine print_output
  open  #1: name 'test.txt', access output
  print #1, using '{ucase}?': 'first line'
  print #1: tab(5); 'second line'
  close #1
  open  #1: name 'test.txt'
  line input #1: record_1$, record_2$
  print record_1$
  print record_2$
  close #1
  end
end routine
|
To document the routine variables, place your cursor anywhere in the routine and press GOLD/D. The Document Routine Variables dialog box will appear:
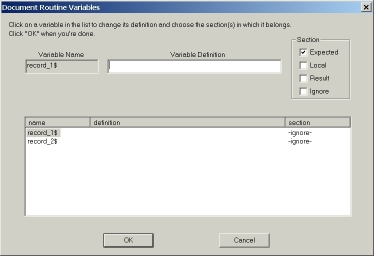
Fill in the variable description for each variable by selecting the variable in the list, then type in the description. Choose whether the variable is Expected, Local, a Result, or if it should be Ignored and not documented. Click on the OK button when you are done. The variable names will be inserted into the routine header under the appropriate heading with the description as shown below:
| Example 5-8 Documented Variables with GOLD/D |
|---|
!%%%%%%%%%%%%%%%%%%%%%%%%%%%%%%%%%%%%%%%%%%%%%%%%%%%%%%%%%%%%%%%%%
!
! Brief description:
!
!
! Expected on entry:
!
!
! Locals used:
!
!
! Results on exit:
!> record_1$ = first line of data printed in the text file
!> record_2$ = second line of data printed in the text file
!
!%%%%%%%%%%%%%%%%%%%%%%%%%%%%%%%%%%%%%%%%%%%%%%%%%%%%%%%%%%%%%%%%%
routine print_output
  open  #1: name 'test.txt', access output
  print #1, using '{ucase}?': 'first line'
  print #1: tab(5); 'second line'
  close #1
  open  #1: name 'test.txt'
  line input #1: record_1$, record_2$
  print record_1$
  print record_2$
  close #1
  end
end routine
|
At this point all the programmer needs to do is ensure that the rest of the routine header is completed and accurate for future programmers to understand.
To wrap long lines of code, the GOLD/F keystroke can be used in SPDEV. In a .SPSRC file, SPDEV will automatically wrap the code at the correct place, insert a & or + at the right margin, and correctly indent the code on the next line.
To set the column number for the right margin wrapping, click on Options in the SPDEV toolbar, then select Change System Settings.
The Settings dialog box will appear. Here the Word Wrap feature can be enabled or disabled, and the right margin column number can be configured.

The following example shows how SheerPower wraps code at the right margin (SheerPower automatically wraps the code as it is being written if Word Wrap is enabled):
| Example 5-9 GOLD/F to Wrap Long Lines of Code |
|---|
! The following is a long line of code to be wrapped: line input menu '"calculator" = Calculator,"DOS Prompt" = DOS Prompt, "EXIT MENU"': choice$ ! Place your cursor on the line of code anywhere, then press GOLD/F. If ! there is more than 1 line to wrap, highlight the code to be wrapped, ! then press GOLD/F. The line of code will now look like: line input menu '"calculator" = Calculator,"DOS Prompt" = DOS Prompt, ' + '"EXIT MENU"': choice$ |
To comment out or uncomment lines or blocks of code/text, you can use the GOLD / keystroke. To use this keystroke, just highlight the text/code you want to comment/uncomment, then press the GOLD / keystroke. SPDEV will automatically insert two forward slashes at the start of each line, or it will remove them.
The compiler ignores lines that begin with the double forward slash, as well as exclamation marks.
The following example illustrates how the GOLD / keystroke works:
| Example 5-10 GOLD / Keystroke to Comment |
|---|
! Copy/paste the sample code into an .spsrc file in SPDEV, then
! highlight the code using your mouse.

  dim months$(6)
  data January, February, March
  data April, May, June
  for i = 1 to 6
    read months$(i)
    print months$(i)
  next i
  end

! Now press either GOLD key (Escape or Num-Lock), let go, then
! press the forward slash key (/). The code will then look like:

//  dim months$(6)
//  data January, February, March
//  data April, May, June
//  for i = 1 to 6
//    read months$(i)
//    print months$(i)
//  next i
//  end
|
To UNCOMMENT a line or block of text/code, just highlight the text and press the GOLD / (forward slash) keystroke. SheerPower will automatically remove the "//" (double forward slash) from the beginning of each line.
This feature allows you to easily have two sets of code within a routine (TEST and PRODUCTION) where you can alternate using one or the other by commenting and uncommenting them out at the same time. For example:
| Example 5-11 Comment and Uncomment Code Simultaneously |
|---|
! Note: the first section of code is already commented out. ! To switch back and forth between the two sections of code, ! highlight all of the code and press GOLD /. // a$ = "one" // b$ = "two" // c$ = "three" // print a$; ', '; b$; ', '; c$ a$ = "testing one..." !++ debug sw October 12, 2003 b$ = "testing two..." !++ debug sw October 12, 2003 c$ = "testing three..." !++ debug sw October 12, 2003 print a$ !++ debug sw October 12, 2003 print b$ !++ debug sw October 12, 2003 print c$ !++ debug sw October 12, 2003 ! After pressing GOLD /, the code will then look like: a$ = "one" b$ = "two" c$ = "three" print a$; ', '; b$; ', '; c$ // // a$ = "testing one..." !++ debug sw October 12, 2003 // b$ = "testing two..." !++ debug sw October 12, 2003 // c$ = "testing three..." !++ debug sw October 12, 2003 // print a$ !++ debug sw October 12, 2003 // print b$ !++ debug sw October 12, 2003 // print c$ !++ debug sw October 12, 2003 ! And the first section of code can be run with the second ! section ignored by the compiler. |
You can change the CASE of the text/code inside any file open in SheerPower by using the GOLD/DOWN ARROW or GOLD/UP ARROW keystrokes.
SheerPower ignores any quoted text.
This makes it simple to convert written code to lower case while keeping quoted text case intact.
| Example 5-12 GOLD/DOWN and UP Arrow for Changing Case |
|---|
! To convert the code below to be ALL lower case, first ! highlight the code: A$ = "ONE" B$ = "TWO" C$ = "THREE" PRINT A$; ', '; B$; ', '; C$; ! Now press the GOLD key, let go, then press the DOWN ! Arrow key. All code not inside of quotes will become ! lower case automatically: a$ = "ONE" b$ = "TWO" c$ = "THREE" print a$; ', '; b$; ', '; c$; ! GOLD/UP Arrow works the same way, changing all unquoted ! text/code into upper case. |
To make indentation easier, you can use the TAB key in SPDEV. Just highlight the line or block of text/code that you want indented, then press the Tab key. The highlighted selection will indent 2 spaces. To further indent, simply continue to press the Tab key until the desired indentation is reached.
The following example shows how the Tab key can be used for indenting code.
| Example 5-13 TAB Key for Indentation |
|---|
! The code below is incorrectly all left-aligned. Highlight the ! 3 lines making up the body of the routine using your mouse. routine print_data print '--1-- --2--' print using "##.## ##.##": 1.3, 1.25 end end routine ! Then press the TAB key. The routine body will automatically indent ! 2 spaces in: routine print_data print '--1-- --2--' print using "##.## ##.##": 1.3, 1.25 end end routine |
You can reverse indent any text or code by first highlighting the line or block of text/code, then pressing the Shift + Tab keys. The highlighted selection will reverse indent 2 spaces.
The following example will show how using the Shift + Tab key can easily correct "over-indentation."
| Example 5-14 Shift + Tab Key to Reverse Indent |
|---|
! The following code has the body of the routine indented
! too far under the routine name. Highlight the 3 lines that
! make up the body of the routine using your mouse.

routine print_integer
    z = integer(4 + (993 * 35))
    print z
    end
end routine

! Now press the Shift key, hold it down, then press the Tab key.
! The highlighted code will move back 2 spaces to be indented
! correctly.

routine print_integer
  z = integer(4 + (993 * 35))
  print z
  end
end routine
|
Using specially mapped keystrokes in SPDEV can greatly improve the quality of code organization, structure, documentation and efficiency. Since the keystrokes can be used as the program is being written, less time is spent trying to fix up the code at the end. This produces code that is clean, easy to read and simple to understand.
For a complete listing of mapped keystrokes in SPDEV, see Appendix F in the SheerPower 4GL, A Guide to the SheerPower Language documentation.
The keymap in SPDEV can be customized to suit any individual preference. See Appendix H in the SheerPower 4GL, A Guide to the SheerPower Language documentation.
To program well you should not have to think too much about the actual code. Making the code simple and easy to understand is where your thoughts should be. It is the logic/problem-solving part of programming that requires 90% of the thinking.
Always choose to write code as simply as possible. It's often tempting to do "clever" things, but simple code is what pays off in the end. At some point in the future, you or someone else will need to look at the code and understand it... quickly! Too much time is wasted by programmers trying to interpret what another programmer (or they, themselves) did in a program or routine.
Writing the programming code is just creating the flow of logic needed to achieve the purpose of a program. So keep it simple and on track.
Think ahead when programming. Assume that the code you're writing will be useful in the future--then make it easily reusable and therefore somewhat generic (including re-entrant). It's worthwhile to take a few extra minutes to ask yourself: "What should this routine look like to make it easily used in the future for similar projects?" When working on a project, separate out dependencies such as calling something "operating system specific" or limiting it to a certain file specification. It is guaranteed that you will want to run this code on a different platform, or use a different file specification, at some point in the future.
To create professional looking code, here are some basic guidelines:
The code must be kept SIMPLE and CLEAN.
Code should always be neat in appearance and well-documented in each routine header.
Always take extra time to write the initial code. 95% of code should work the first time if it's written with care.
Put each small "concept" within the program into a separate routine. This is the single most important point about program structure. Use subroutines as a packaging mechanism to organize the individual thoughts and concepts in the program. The size of a concept will be subjective, but the smaller the thoughts or concepts you break a program into, the more successful you will be writing code.
Each routine should be under 25 lines. If the number of lines exceeds 25, the routine is becoming too complex. If your code no longer fits on one screen, you really need to ask yourself: "WHY?" There should be many routines and subroutines written.
There are exceptions, however. CASE/SWITCH-type statements where the number of cases is very large can make a routine much longer than normal. In such instances, the individual cases should translate to routine calls to do the work rather than inline code.
Keep columns short (up to 80 characters). Many people use Notebook computers or have smaller monitors. Keeping the columns to 80 characters or fewer guarantees that all of the code will appear in the screen area. This will keep the viewer from having to scroll horizontally to see the ends of the lines.
Avoid more than three levels of indentation (nested LOOPS and IFs, etc.). Three levels or fewer keeps the code in a routine from becoming too complex. If there are more, then an inner loop should be moved out to a new routine. This keeps the code looking neat, clean, and easy for the reader to follow.
Be consistent with names within the program. Making up different names for the same thing is too difficult to follow. Variables and routines should be named in a manner that explains their meaning. Additionally, strive to keep names short and simple.
Always line up "=" signs. When declaring variables, list them alphabetically to make them easy to find. Initialize variables at the top of the routine.
Avoid doing IF ELSEs. IF ELSEs complicate code. For example, a well-written program that contains 25,000 lines of code (including comments) might have approximately 20 ELSEs compared to over a thousand IFs. This illustrates how rare an IF ELSE should be. If an IF ELSE is necessary, then the IF should be the short line of code, and the ELSE the long line.
Use RETURN statements as soon as possible within a routine. Do not wait until you get to the bottom of the routine. This will eliminate a LOT of ELSEs and funky loops and BUGS!
Always make the call, then test the result in the conditional expression statement. In general, never set variables to something, or test the result of a function call in an IF, DO or FOR expression.
Use parentheses around every set of operations. This makes it easy to determine the beginning and end of an operation. It also makes it absolutely clear what you intended, without depending on the order of precedence of operators. If someone reading the code can know with absolute certainty how you intended it to be executed via the use of parentheses, then they will not have to wonder if the language you used created code other than what you intended it to create. For example:
if a > b * c or d + 4 = f then x = x + 1
if ((a > (b * c)) or ((d + 4) = f)) then x = x + 1
Code should be language-independent. Code should be written so that programmers of all kinds of different languages can understand it. All languages have more or less the same constructs. There are language-specific items that will be unavoidable, but they should be few and far between. They should not get in the way of someone understanding the code, even if that person has never programmed in that language before.
Make code easy to understand quickly. It should take no more than 30 seconds to understand a line of code, and no more than 10 minutes to understand a routine. If the reader has to sit down and figure it out, the code is poorly written. Poorly written code is guaranteed to have bugs!
Avoid writing extraneous code. When writing the code, ask yourself: "Is this code really necessary?" Extraneous code makes for a complicated routine and is difficult to understand later. Once in a while, however, it is necessary to include some extra code purely for the sake of clarity.
Make code understandable and concise. Think about the code just written and see if there's a shorter, more concise and understandable way of writing it. However, sometimes taking a shortcut to write the code smaller can make it LESS understandable--so keep in mind that understandability is the main goal!
Always do a thorough code review before you compile it. A code review should enable you to find the logic flaws even before the first compile. The majority of errors will then be compile errors--and generally trivial ones at that. When you start your code review, ask yourself: "What did I do incorrectly?" Get into the mindset that your code has errors/bugs as opposed to thinking, "Of course it's right---I wrote it!" It's easier to find your errors when you're expecting them rather than using *selective vision* during your review.
Focus on writing good code, not debugging bad code. **A good programmer is one who spends very little time working with debuggers. Don't focus on debugging your code--focus on writing code that doesn't contain any bugs!**
Test the smallest parts of code. Take the routine and write a program to test it. Later when you go back to that code, you will know that routine will always work unless some changes were made to it. This can be particularly handy when having to debug, since the already-tested routine can be ruled out right away.
Always document code thoroughly in each routine header. Ideally, commenting should rarely be done inside the actual routine. If the routine is written simply and kept short, then no comments are needed within the code. Keep the size and scope of the routine limited and obvious for future reference.
Do not be afraid to rewrite or modify your code! When rewriting or modifying code, whether it's your own or someone else's, it's essential to have a backup copy of the ORIGINAL kept in a safe place. This way, if you need to scrap your changes, the original working copy won't be lost. You may lose the time that you spent doing the modifications--but at least you will still have what you started out with before making any changes. A second hard drive is recommended to store all programs for safekeeping.
Organize your routines in logical or alphabetical order. In shorter programs, the routines should follow each other in a logical order within the program. For longer programs with many routines, putting the routines in alphabetical order makes it easier to find a routine when needed.
Group routines into small modules. Every attempt should be made to group similar routines into separate source modules to keep module size smaller, which makes it easier to locate things. GLOBAL routines should be grouped together alphabetically, as should LOCAL routines.
The key to creating excellent code is in writing small routines that express individual thoughts/concepts.
Carefully writing your code and performing regular, thorough code checks can virtually eliminate the need for debugging--saving much time and frustration.
Most of the time spent on programming is NOT on the initial code creation itself, but in getting it to work, future modifications, and continuing to keep it working.
A good understanding of the purpose of the specific piece of code being worked on would help to create professional-looking code.
A programmer's creativity comes from the manner in which the problem is solved, NOT in the actual coding.
Always remember---the very best solutions expressed in code are the ones that any beginning programmer can understand.
| [ ] | Code is written in lower case. |
| [ ] | Code begins at the first character on each line. |
| [ ] | All temporary variable and array names are a single letter, or a single letter followed by a number. |
| [ ] |
All debug code is noted with the correct designation:
!++ debug programmers_initials ++ |
| [ ] | IF THEN statements contain two spaces between the IF and the condition, and two spaces between the condition and the THEN. |
| [ ] | The block of code under loops is indented two spaces under the beginning statement. |
| [ ] | Parentheses are around all sets of operations. |
| [ ] | All target routines in code follow the routines that call them. |
| [ ] | The length of the body of routines does not exceed 25 lines and 80 columns wide. |
| [ ] | Routines are separated by three blank lines. |
| [ ] | All routines have correctly formatted headers. |
| [ ] | All routine names in the headers are lower case and double-spaced. |
| [ ] | Any routines that are longer than 25 lines contain an explanation in the header of why they are longer. |
| Index | Contents |